Self Service Plan and Register
Coastal Carolina University's new Self Service system provides a variety of degree planning and registration tools to make course planning and registration an easy, interactive process. To begin the process for planning your degree, start by consulting your advisor. Together, you will discuss the order in which you should take courses for the most efficient path to graduation.
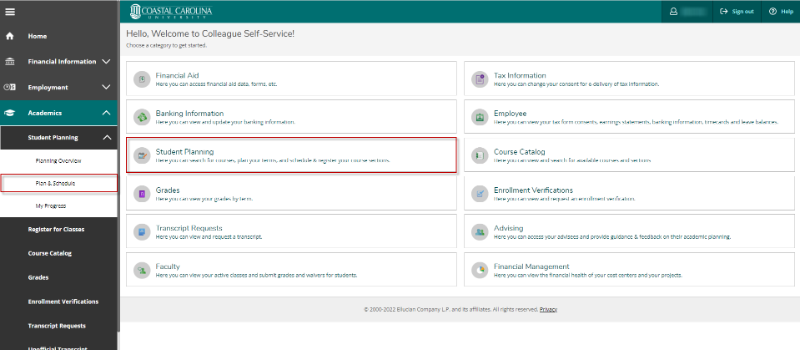
To help you navigate this process, Self Service provides the Plan & Schedule tool as a component of Student Planning. To access the Plan & Schedule tool, begin by accessing Student Planning from the Home menu, or via the left navigation menu.
Accessing Plan & Schedule
Navigating Plan & Schedule
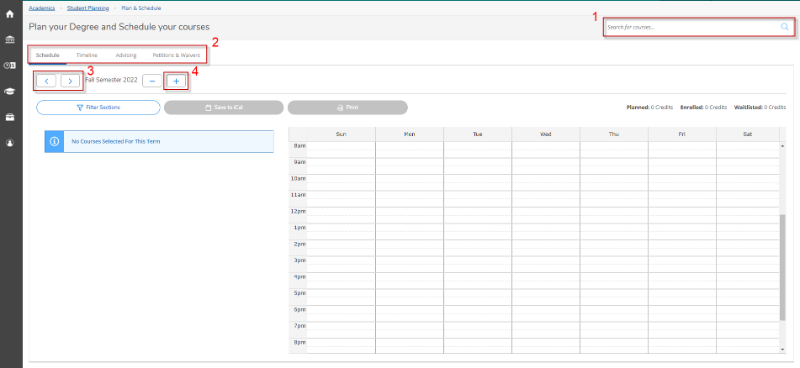
The Plan and Schedule tool offers several ways to interact with the planning process. These include:
- Direct course search for courses to add to your plan
- Schedule and Timeline views of your plan, as well as access to contact your advisor
- Navigation between terms
- Ability to add or remove terms from your plan
Adding Courses to your Course Plan
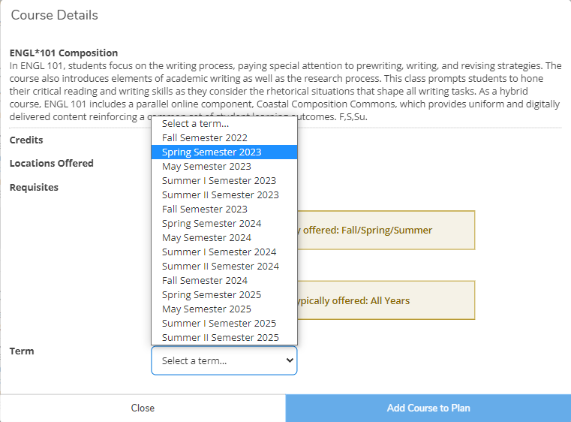
Students can add courses to specific terms in your course plan , by searching for those courses in the course catalog, or by using the direct search in the top right of the Plan and Schedule tool. In the course results, you will see an "Add course to plan" button beside each course result. To add that course to your plan, click "Add course to plan" and select the appropriate term from the resulting dropdown.

Viewing your Registration Appointment Time
Each semester, continuing students are issued a registration appointment time for Advance Registration. In the Plan and Schedule tool, when you navigate to a given term, if you have been issued a registration appointment time for that term, it will appear above your schedule information as shown below.

Acting on your Course Plan
After adding courses to your plan, either via your My Progress report, or by directly searching for courses in the Course Catalog, they will appear on your Course Plan in the Plan & Schedule tool. From there, you can view available sections, select sections that work for you, and register, all directly from the Plan & Schedule tool.
By selecting the "View other sections" option for your course (1), you can see when those sections are offered and select the one that best suits your schedule (2). Different sections may have different warnings, and the warnings help you determine which sections might not allow registration at the moment (3).

Adding and Dropping Co-Requisites
Co-requisite courses, generally class/lab combos, must be added and dropped together to meet the requisite requirements. To add co-requisites to your schedule, add the desired sections to your plan and click "Register Now" to register everything on your plan at once.
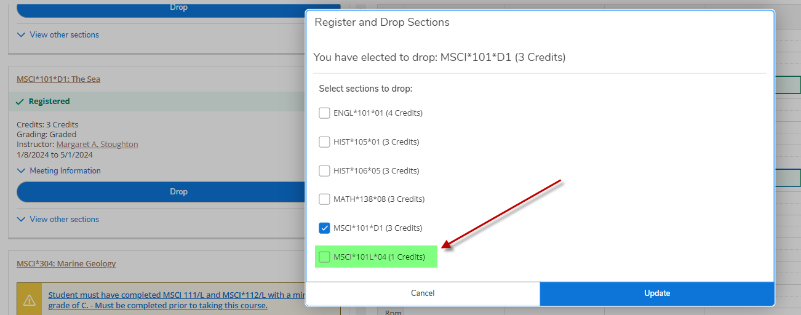
To drop co-requisites, select one of the courses to drop and click "Drop". You should see a second window as shown below, and you should select the co-requisite class as well. This will drop both classes simultaneously. Doing so any other way will result in an error since once of the co-reqs cannot be on your schedule without the other.
Timeline View
The Timeline view in the Plan & Schedule tool is intended to give you a quick, chronological progression of the courses that you have planned for this, and future, terms. The Timeline view can be accessed via the Plan & Schedule ribbon, and has a number of functions including:
- Timeline view access
- Course Catalog search
- Ability to add new terms to plan
- Chronological listing of planned courses, by term
- Controls to drag-and-drop courses between terms, or remove them from the plan completely

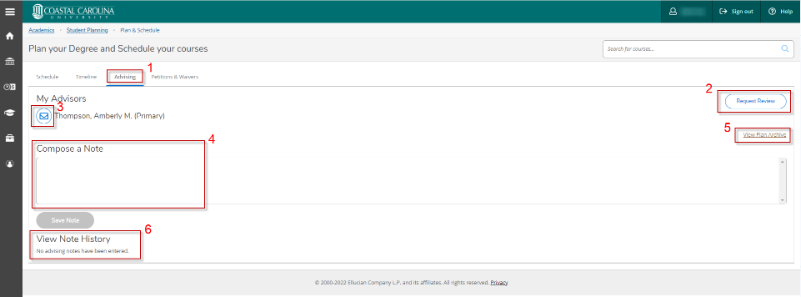
Contacting your Advisor
The Plan & Schedule tool contains an Advisor section, which provides a number of tools for communicating with your advisor. These include:
- Advising - access your advising tools via the Plan & Schedule ribbon
- Request a Review - Whenever you feel like your plan is ready for your advisor's review, you can click the "Request Review" button and your advisor will get an email with a link to your plan, where they can see exactly what you have planned. When your advisor completes their review, it will archive the plan as a PDF, which can be accessed in this same tool. You may complete any number of review cycles until you and your advisor both feel you are ready to register. Whenever your advisor completes the advising process, you will receive an email stating that your holds have been lifted and that you may register at your appointed time.
- Email your advisor - Through this tool, you can choose to email any specific advisor directly by clicking on the Mail icon, which will open your default email client.
- Compose a note - You may also compose and save a note for your advisor. When you do this, your advisor gets an email indicating that you've added a note for their review. This is generally a good idea when you have multiple advisors, and you want them all to see the same information since all your advisors have access to this same area.
- View Plan Archive - Each time your advisor completes a review of your plan, they have the option of archiving that plan. This archive is a snapshot in time, at the moment the plan was archived. You can view these archived plans here.
- View Note History - This space keeps a threaded history of all the notes between you and your advisor(s).